



A flawless automotive paint job can elevate your car’s appearance and restore its original brilliance. Whether you’re refreshing an old vehicle or adding a custom touch, learning how to apply automotive paint like a pro is a valuable skill. Achieving a professional finish takes preparation, precision, and patience, but the effort is well worth the results.
Prepare the Workspace
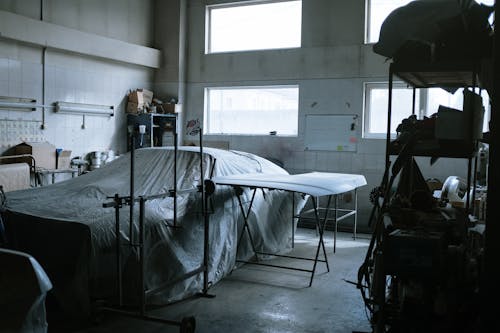
Creating the right environment is critical for achieving a high-quality paint job. Dust, debris, and fluctuating temperatures can ruin even the most careful application.
- Choose a Clean and Ventilated Space: An enclosed garage with proper ventilation ensures better control over contaminants.
- Invest in Protective Gear: Wear a respirator mask, gloves, and goggles to protect yourself from harmful paint fumes.
- Install Adequate Lighting: Bright, even lighting helps you identify imperfections and maintain consistent coverage.
A well-prepped workspace is the foundation for painting your car like an expert.
Surface Preparation
Proper surface preparation sets the foundation for a smooth and durable finish. Skipping this phase can result in uneven paint, peeling, or premature wear.
- Wash the Vehicle Thoroughly: Remove dirt, grease, and old wax using a degreaser or automotive soap.
- Sand the Surface: Sand the car using 320- to 600-grit sandpaper. This process removes old paint layers and provides a rough surface for the primer to adhere.
- Repair Imperfections: Fill dents or scratches with body filler, then sand the repaired areas to blend them seamlessly with the car’s surface.
- Mask Off Areas: Use painter’s tape and plastic sheeting to cover windows, trim, and any parts that don’t require paint.
Attention to detail during preparation ensures the final result looks professional.
Primer Application
The primer acts as a base for the paint and ensures better adhesion. It also prevents rust and smooths out surface inconsistencies.
- Choose the Right Primer: Epoxy primers are ideal for bare metal, while urethane primers work well for surfaces with existing paint.
- Apply Even Coats: Using a spray gun, apply thin and even coats of primer. Hold the gun about 6 to 8 inches from the surface.
- Allow Proper Drying Time: Follow the manufacturer’s instructions for drying, typically 20 to 30 minutes between coats.
- Sand the Primer: After the primer dries, wet sand it with 600-grit sandpaper to create an ultra-smooth surface.
This meticulous priming process ensures the paint adheres seamlessly, paving the way for a professional finish.
Painting the Base Coat
The base coat is where the vehicle’s color comes to life. This phase requires precision and patience to ensure a uniform and vibrant finish.
- Mix the Paint Properly: Follow the manufacturer’s mixing instructions, combining the paint with the appropriate reducer for optimal consistency.
- Use Smooth Strokes: Apply the base coat in steady, overlapping strokes to prevent streaks or uneven coverage.
- Apply Multiple Layers: Two to three coats are typically necessary for full coverage. Allow each layer to dry for 15 to 30 minutes before applying the next.
- Inspect for Flaws: After the base coat dries, inspect the surface for imperfections, and sand lightly if needed before applying the clear coat.
When executed correctly, this stage ensures your car’s color looks deep and professional.
Clear Coat Application
The clear coat provides protection and a glossy finish, making it a crucial part of professional car paint application.
- Use a Quality Clear Coat: Invest in a high-quality, UV-resistant clear coat for long-lasting protection.
- Apply Thin Layers: Just like the base coat, spray the clear coat in thin, even layers.
- Build Up the Shine: Apply two to three layers, allowing proper drying time between coats.
- Wet Sand for a Mirror Finish: Once the clear coat cures, wet sand it with ultra-fine sandpaper (1,500- to 2,000-grit), then polish it to achieve a flawless, reflective surface.
This phase is where your efforts truly pay off, as the glossy finish brings depth and durability to your paint job.
Post-Paint Care
After completing the paint application, your work isn’t entirely done. Proper post-paint care ensures the longevity of your finish.
- Curing Time: Allow the paint to cure fully, which can take up to 30 days. Avoid washing or waxing the car during this period.
- Regular Maintenance: Use gentle, non-abrasive cleaning products to keep the paint looking fresh. Apply a protective wax coating after curing to enhance durability.
Consistent maintenance will keep your car looking as good as the day you painted it.
Automotive Painting Tips for Success
Achieving a showroom-quality finish takes more than just following guidelines. Here are some expert automotive painting tips to elevate your skills:
- Invest in a Quality Spray Gun: A reliable spray gun provides better control and a more consistent application.
- Practice First: Before painting the car, practice on scrap metal to perfect your technique.
- Work in Ideal Conditions: Avoid painting in high humidity or extreme temperatures, as these can affect drying times and paint adhesion.
- Use Proper Reducers: Match the reducer to the temperature and humidity for optimal results.
Conclusion
Painting your car is a rewarding project that can transform its appearance and increase its value. By following these guidelines to apply automotive paint like a pro, you’ll gain the confidence and skills to achieve a finish that rivals professional work. Whether it’s your first project or you’re a seasoned DIY enthusiast, these automotive painting tips and techniques will ensure your hard work pays off with a sleek, polished result.
More Stories
The Ultimate Guide to Choosing the Right Automotive Paint
The Pros and Cons of Matte vs. Glossy Automotive Paint
Top Automotive Paint Trends for 2024